s3delmany.sh – Delete Many S3 Objects With One Command

Update: The Amazon S3 service API now allows for deleting multiple objects with one request (up to 1,000 objects per request). Please see the Amazon S3 Developer Guide for more information.

I've been doing some stuff at work using Amazon S3 to store files and during my testing I uploaded a ton of files that didn't need to be there. Unfortunately, the command line tool I'm using, s3cmd, does not allow me to delete multiple files at once. There is no way to do a wild-card delete. This means I would need to get the full path to each object and delete them one by one:

./s3cmd del s3://s3.ekarma.net/img/1205794432gosD.jpg
Object s3://s3.ekarma.net/img/1205794432gosD.jpg deleted
./s3cmd del s3://s3.ekarma.net/img/1205794432g34fjd.jpg
Object s3://s3.ekarma.net/img/1205794432g34fjd.jpg deleted

Yea, there's no way I'm doing that for over 200 objects. I mean come on, there are tools to automate this kind of stuff! So I created s3delmany.sh:

#!/bin/sh
# -------------------------
# s3delmany.sh
# Author: Raam Dev
#
# Accepts a list of S3 objects, strips everything
# except the column containing the objects,
# and runs the delete command on each object.
# -------------------------

# Redirect output to the screen
2>&1

# If not using s3cmd, change this to the delete command
DELCMD="./s3cmd del"

# If not using s3cmd, change $4 to match the column number
# that contains the full URL to the file.
# This basically strips the rest of the junk out so
# we end up with a list of S3 objects.
DLIST=`awk 'BEGIN { print "" } { print $4, "t"} END { print ""}'`

# Now that we have a list of objects,
# we can delete each one by running the delete command.
for i in "$DLIST"; do $DELCMD $i
done

Download
s3delmany.zip

Installation
1. Extract s3delmany.zip (you can put it wherever, but I put it in the same directory as s3cmd).
2. Edit it with a text editor and make sure DELCMD is set correctly. If you're not using s3cmd, change it to match the delete object command for that tool.
3. Make it executable: chmod 755 s3delmany.sh

Usage
If you're using s3cmd and you placed s3delmany.sh in the /s3cmd/ directory, you should be able to use the script without modifying it. The script works by taking a list of objects and running the delete command on each one.

To pass s3delmany.sh a list of objects, you can run a command like this:

./s3cmd ls s3://s3.ekarma.net/img/ | ./s3delmany.sh

This will delete all objects under /img/. Make sure you know the output of your s3cmd ls command before you pass it to s3delmany.sh! There is no prompt asking if you're sure you want to delete the list, so get it right the first time!

Hint: s3cmd doesn't allow you do use wild-cards, but when you run the ls command, you can specify the beginning of an object name and it will only return objects starting with that. For example, s3cmd ls s3://s3.ekarma.net/img/DSC_, will return only those objects that begin with DSC_.

Alternate Usage
If you have a text file containing a list of S3 objects that you want to delete, you can simply change print $4 to print $1 and then do something like this:

cat list.txt | ./s3delmany.sh

By the way, print $4 simply tells s3delmany.sh that the S3 objects are in the 4th column of the data passed to it. The ./s3cmd ls command outputs a list and the object names are in the 4th column. The awk command expects the columns to be separated by tabs (t).

If you have any questions or comments, please don't hesitate to use the comment form below!

My own version of the $1 Image Stabilizer

I've seen the $14 Steadycam "The Poor Mans Steadicam" in the past and always thought it would be a cool project to tackle whenever I have some free time (aka never). Even though I own more tools than I'm able to name (when you take care of your own rental properties you need a wide array of tools!), the large number of tools and parts required for the "Poor Mans Steadicam" always turned me off.

Then I saw this cool $1 Image Stabilizer video from MetaCafe:

$1 Image Stabilizer For Any Camera - Lose The Tripod - The best free videos are right here

Sure enough, I found an immediate need for an image stabilizer when I took pictures of the box for my new MacBook Pro power supply. I had some rope in my closet and I remembered the tripod adapter which screws into the bottom of my camera already had a little hole that I could loop the rope through. It took two minutes of my time to tie the rope around the tripod adapter. I then stood on the excess rope and pulled up to steady the camera:

It worked great! Here is the first picture I took without the stabilizer and here is the second picture taken with the stabilizer. You can clearly see the difference!

My co-worker, Raf, spontaneously came up with the idea of using a giant rubber band instead of string or rope. Just as he was laughing it off as a silly idea, I told him I actually have giant rubber bands that I use for fitness. As I was writing this post, I decided to try out his idea:

It also worked well, however the because the rubber band needs to loop around the camera, it was uncomfortable and also difficult to access the camera controls. Besides, not only would I not want to carry around a giant rubber band, I also wouldn't want the camera to slip out of my hands and go crashing to the ground just as I lifted it to take a picture!

I love the way pictures come out when taken with natural light (no flash). However, when the camera detects low light it slows the shutter speed down so it can absorb enough light to make a clear picture. Even the slightest movement during this slow shutter speed will cause the picture to come out blurry. It's quite amazing how such a simple image stabilizer fixes that problem!

Attic Studio Renovation

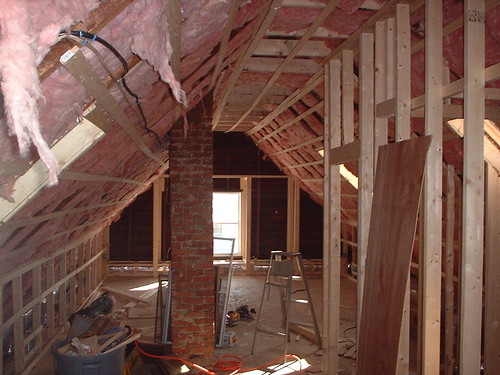
Back in 2003 I spent about $30,000 turning the attic of my 100 year old house into a beautiful studio apartment. I found these pictures while browsing my computer today.

Most of the framing and insulation was done by a contractor. I helped my uncle sheetrock the entire place. My dad and I did the painting, built the two closets, installed custom kitchen counters, and did some of the plumbing. I installed the lights, the hardwood floor, and the shower.

I lived in this studio for a few years until I moved into the partially renovated basement (where I happened to install the exact same shower). This attic studio is now rented for $750 a month.

My First (Real) Electronics Project / Invention

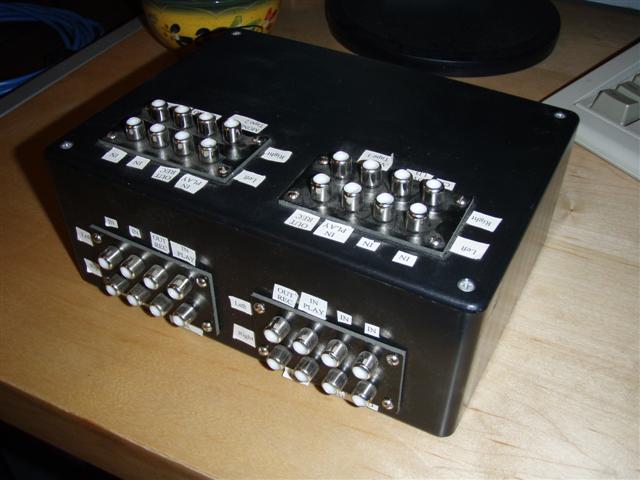
When I was 13 or 14 years old I discovered the need for something to easily change the connections made between VCR's, tape decks, and speakers. I needed to change inputs and move cables around to different ports. Constantly moving around equipment to access the ports on the back was becoming very cumbersome. I needed an AV Selector. Although one probably existed at the time, I didn't know of its existence and so I marched on with inventing one.

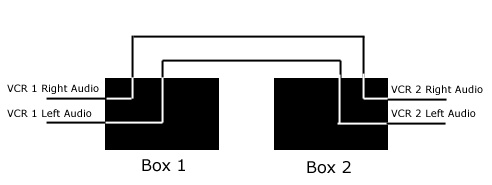
I had never soldered before, and this was the first time I found a real purpose to solder. My solution was simple: Connect each of the cables coming from the equipment into a box that was easily accessible. For each port on the equipment, the box would have two ports: one that connects from the equipment to the box and then another on the box that connects to another one of these boxes, which is connected to yet more equipment. This would allow me to be able to unplug and change the connections easily by simply manging the connections on the boxes.

To help you understand how this actually worked, I whipped up a quick diagram:

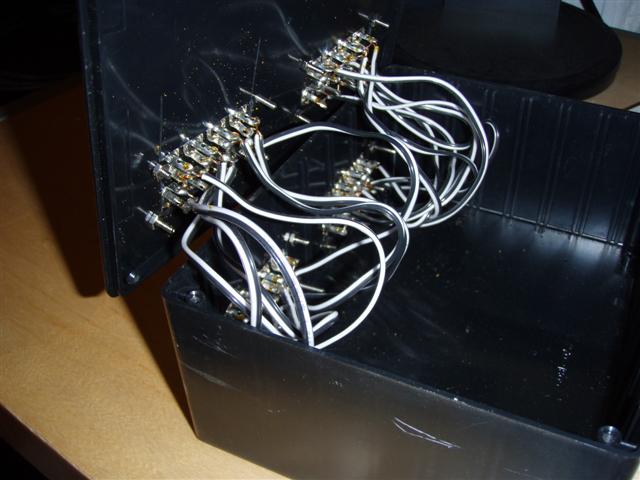
So I bought some parts from the local RadioShack, including a little plastic project box which needed to have openings cut out for the ports (very difficult without the right tools -- I think I used a razor and broke a few blades). A few hours later, and my invention was complete. It certainly wasn't pretty, but it worked exactly as I planned!

Of course there are much more professional AV Switchers out there now, such as this one made by Sony:

ImgListGenerator

Introduction

I've been doing a lot of eBay auctions lately and one of the most time consuming parts was creating the HTML for all the images in my auction description. I could reuse a lot the HTML, simply changing the directory and image names, but it was still a lot of repetitive work. This week I had 25 items to list and the repetitive work really got to me, so I stopped and spent 30 minutes putting together a script that would help me.

Usage

To simplify things, I decided not to support the ability to choose the directory with the images for which you want to generate HTML. Instead, you simply upload the index.php file to the directory that contains your images, visit that directory with your web browser, and the HTML is generated. Since your web browser reads HTML, the images will be displayed just as they would in your eBay auction. Simply right click on the page, choose View Source, copy the nicely formatted HTML and paste it into your eBay description.

You can view this script in action by browsing some of my images here.

Details

Here's a sample output from this script:

<p align="center"><img src="http://www.ekarma.net/demo/pics/sample/DSC_0001.jpg"></p>
<p align="center"><img src="http://www.ekarma.net/demo/pics/sample/DSC_0003.jpg"></p>
<p align="center"><img src="http://www.ekarma.net/demo/pics/sample/DSC_0004.JPG"></p>
<p align="center"><img src="http://www.ekarma.net/demo/pics/sample/DSC_0010.JPG"></p>

The code I had to write for this script was rather simple. The real meat of the work is done by a very nice function called preg_find() by Paul Gregg. His code is too much to show here, but I'll show you the code I wrote for this little script:

// Find all .jpg or .JPG files in the current directory using preg_find()
$files = preg_find('/.jpg|.JPG/', '.', PREG_FIND_SORTBASENAME);

// Store the path to the current directory
// (PHP_SELF includes index.php, so we use substr to remove that)
$link_dir = substr($_SERVER['PHP_SELF'], 0, -9);

// Loop through each of the files and generate the HTML
foreach($files as $file){
$my_file = substr($file, 2, strlen($file));
echo "<p align="center"><img src="http://" /></p>\n"; 
}

That's it! Of course it would be much nicer if you could upload this script to the root directory and either enter or choose a path with images, then click generate. However, this script does exactly what I need, so I don't plan to make any changes to it.

Download

This script can be downloaded here: index.php.zip (4KB)

Project Magnolia

As I mentioned a few days ago, Thea and I are starting a new project together. We'll be using PHP & MySQL on the backend and CSS, XHTML, & AJAX on the front end. Exact project goals have not yet been defined, however we already have a good idea what Magnolia will be: A retail store that allows easy category and item management, while providing the most common tools to serve customers. It would probably make more sense to make use of an open-source shopping cart, however we're both doing this as a learning process and to build project organization skills.

I've created a wiki for the project to help with documentation and development. You can check it out here. I've decided to make the wiki public, as I can't imagine there will be any confidential information added to it. Since the wiki is open to the public, feel free to add your own feature requests to the Feature Requests section of the wiki.

A sore body and a new collaboration

I am incredibly sore from Monday and Tuesdays workouts. Ravi wanted to do arms on Tuesday, so we did workout C instead of workout B. That was probably a bad idea, because it didn't give my chest or arm muscles enough time to recover from the previous day's workout. I'm mostly feeling it in my triceps and obliques -- when I lift my arms over my head.

I've been going over Thea's place on Wednesday nights and tutoring him in PHP programming. The past few sessions haven't been very productive, but thats because I had to get his programming environment setup properly. I installed XAMPP and Eclipse (with the PHP plugin). We decided today that we're going to work on a project together; a web retail store which will allow Wholesale Floral Corp to sell discontinued items to the public. Building this application together will be excellent experience for the both of us. We're going to use the Smarty PHP template engine and stick to Object-Oriented programming as much as possible. To collaborate our development work we're going to use my home CVS server.

SimplrRaam – Modified Simplr Theme

As you can see, I am now using a modified version of the WordPress Simplr theme by Scott. It took me a good 4 1/2 hours to modify and to make sure everything was working the way I wanted it to.

Changes:

  • The sidebar has been moved from the bottom to the right.
  • Single post pages are shown without any sidebar to make room for actual post content when you're reading the post.
  • Each of the pages (About, Contact, Archives, etc) also do not show the sidebar.
  • From the main page, when you click one of the categories from the sidebar to browse the posts in that category, you will be provided with a sidebar to further navigate via categories while you're reading posts.
  • The theme is designed to stretch with the browser window, so it should work on many different resolutions (even 640x480, though that wouldn't be very usable)
  • Moved the title of the blog into the top left corner, on the same line as the page links
  • Moved the tagline (my quote) to the right corner, under the page links

Important Installation Notes:

  • You can no longer use the Simplr Layout Width or Sidebar Layout options.
  • You MUST change Layout Width to 95% once you have activated the theme.
  • I recommend you set the Base Font Size to 75%
  • If you change the Base Font Size option to something greater than 75%, you may need to increase the following in style.css: div.postcontainer { margin-right: 330px; }
  • The rest of the Simplr options should work.

Screenshot:

Download: simplrraam.zip (379kb)

Keep in mind that I did this in a hurry, so many of my changes to the theme files are not documented. I also plugged in extra CSS styles where I needed to get things working. Please feel free to post comments, fixes, or suggestions to this theme below.

Adding Power and Lights to my Shed

I needed light in my shed and the only way I would be satisfied was if I had real lights, not those dim battery operated ones. Besides, I know having an outlet in the shed to plug things into would be very helpful. I already ran the wire to my door when I installed the outside light, so all I needed to do was get the power 12 feet away to my shed.

First I dug a 14" deep trench between my basement door and shed (sorry, no pics of the trench 🙁 the line in the sand shows where the trench was). Inside that trench I laid metal conduit with an outdoor 12/2 wire inside. Since I might build a summer house next spring, I figured I would take advantage of running the wire and add a CAT5 Ethernet cable along side the power cable. I'm not sure how the power cable will effect the data running on the CAT5 cable, but I had extra CAT5 cable laying around so I ran it anyway.

I used flexible conduit at the basement door and where the wire comes up from the trench into the shed.

After adding a junction box to the ceiling of the basement entrance (power in on the top, on the bottom one wire to outside light, one wire to shed), I added a junction box inside the shed where the wire comes in. I'm going to be adding an outlet later and having the junction box right there will make that a lot easier. I then ran power up to a switch and from the switch up to the florescent light. The switch will control two lights, but I'm only attaching one light for now. I ran the wire for the second light but just wrapped the end with electrical tape.

Once I attached and wired the florescent light to the ceiling joists of the shed, I turned on the breaker in my basement and flipped the switch in the shed.

Building a shed from scratch

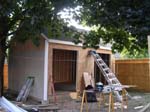
Building a 12'x16' shed from scratchThis project, like the basement project, started in 2004 when I began digging out the dirt from my basement. I realized I had no place to store everything that was in the basement and the old 8'x6' shed in my backyard was already full of stuff (and not very organized I might add), so I really had no where to store anything. Since I started purchasing investment properties and maintaining them myself, my collection of tools grew. I realized I needed a nice big area in which to organize and store everything. As usual, I looked into what I could build to fix that problem. Continue reading

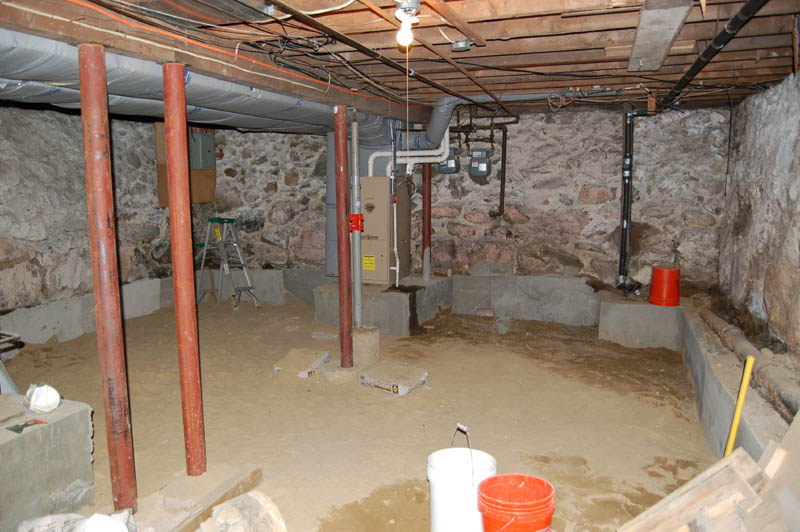
Renovating a 100 year old basement


The basement of my two-family house started with a dirt floor and approximately 6′ of clearance from the dirt to the first floor rafters. Some of the pipes made the clearance even less. I decided that I wanted to make the basement into a livable area, however that would only be possible with a concrete floor. I also realized that if I wanted to put in a ceiling, I would need at least another 2′ of clearance. The first shovel full of dirt was removed in 2004. I had planned on completing the basement that year, however I had no idea how much work would be involved. Continue reading